Have you ever felt that creating software is like putting together a puzzle while wearing a blindfold? If the answer is “YES”, don’t worry! Agile Prototyping can make software development more enjoyable by incorporating creativity and teamwork into the process.
In software development, a prototype is a preliminary version of a digital product created to test design, functionality, and user experience. They are a valuable and cost-effective tool to gather feedback, identify potential issues, and validate and refine ideas before actual development begins.
In this blog post, I’ll talk about why considering prototyping is a good choice for the software development process and I’ll give you some examples so that you can put together the information more easily.
Let’s dive deeper into the topic.
What is a prototype in Agile software development?
A prototype is an initial version of a product that emphasizes its functionality and provides stakeholders with a glimpse of the final product.
Looking at a prototype and getting an idea of how the functionality will look like and behave, allows you to spot mistakes and identify the changes you might want to make before you invest a lot of time and money in the actual building process.
This is one of the easiest and quickest ways to test an idea and make sure you create software that works well and meets the needs of the people who will use it.
When do I find prototyping to be useful?
As someone who works on software products, I love working with prototypes. To me, they’ve proved to be incredibly valuable. Here are some situations when I would want to use prototypes:
- Clarify or refine requirements
Because it’s a visual representation of the product’s features and functionalities, it makes it a lot easier for developers and stakeholders to understand what we’re trying to achieve.
- Gather early feedback from users or stakeholders
Letting stakeholders interact with the prototype provides valuable insights into its usability and functionality. They can understand much more easily what we do, which is to our advantage because we don’t have to spend so much time convincing them that we could deliver a great outcome to the users.
- Validate ideas or concepts
When I can test different approaches and solutions, I can ensure they align with the product’s objectives and user needs. This approach helps me make informed decisions while developing the final product.
Why do I work with prototypes?
Personally, I find it challenging to envision how something will look before I see it. That’s why I think visualizing the user interface early on and testing it out is essential. It gives me the confidence to align the product with user needs and preferences. Plus, there are many other benefits to using prototypes that can be very helpful. For example:
- Reduced Risk
They help me catch any errors or issues before they become major roadblocks down the line. Plus, it’s always better to catch mistakes early on when they’re still easy to fix! So, in short, using prototypes is a great way to minimize risks and ensure a high-quality product.
- Effective Planning
By testing the feasibility of design and functionality early on, I can make informed decisions about resource allocation, timelines, and priorities, leading to more effective planning.
- Reduced Cost
Making changes in the later stages of development can be a costly and time-consuming process. That’s why it’s crucial to identify design and usability issues as early as possible. By using prototypes, I can catch potential problems before they spiral out of control. This saves me time and money in the long run by preventing costly rework and ensuring that the final product is a great one.
- Stakeholder Engagement
Prototypes lead to more informed discussions and decisions, and can even spark some creative ideas and feedback. So, if you’re looking for a playful way to get your stakeholders on board, why not try creating some prototypes?
Wireframe vs Mock-up vs Prototype
While coding is not always necessary for creating prototypes, there are cases where coding can be beneficial, especially for more complex interactions or to demonstrate specific functionalities that might be challenging to achieve with design tools alone.
The choice of approach depends on the project’s complexity, the team’s skill set, and the desired level of interactivity for the prototype.
1. Wireframe
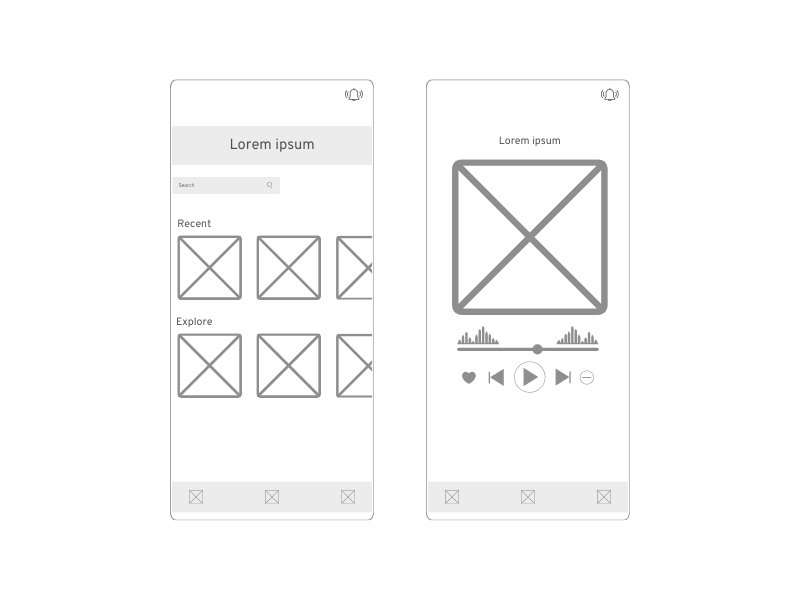
What: Wireframes are a low-fidelity method where a digital representation of the product’s layout and structure is created. It’s done using specialized software, and it’s a visual guide that represents the skeletal framework of the product.
When: When you’re in the early stages of creating a product, wireframes are a great tool to gather feedback on the layout and structural elements of your design before you create a high-fidelity prototype.
2. Mock-up
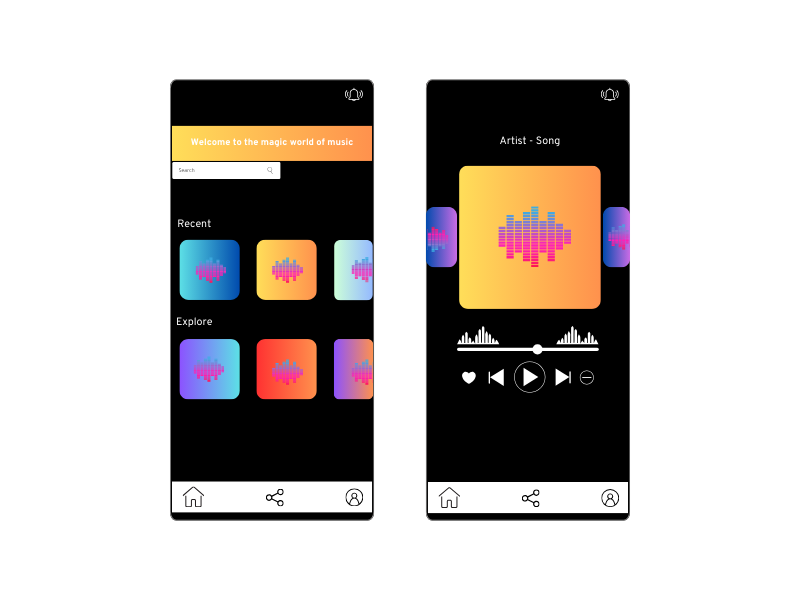
What: A mockup is a high-fidelity visual representation of a product’s design, often made with design software or tools. It’s more detailed than a wireframe and generally showcases the visual and aesthetic elements of a product.
Mockups offer a static, non-interactive view of the final product, allowing designers and stakeholders to understand the look, feel, and layout of the design. They often include color schemes, typography, and images, providing a clearer picture of the intended design compared to wireframes or low-fidelity prototypes.
When: Useful in soliciting feedback from stakeholders, clients, or team members regarding the aesthetics and appearance of the product before progressing further. They can serve as a visual reference or guide for the development team, offering a clear understanding of the design aesthetics and goals before coding or detailed development begins.
3. Prototype
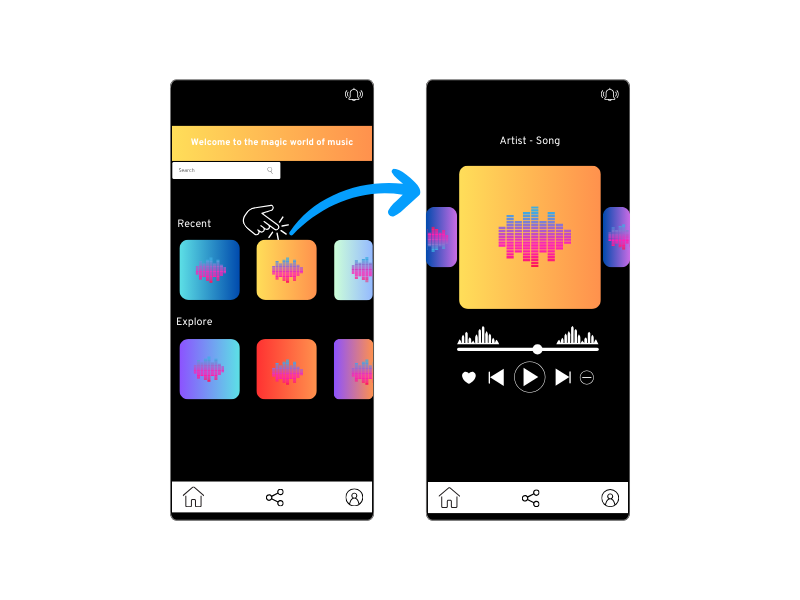
What: These are interactive and often mimic the look and feel of the final product. Users can click through the interface, providing a more realistic experience.
When: Clickable prototypes are useful during the later stages of design or product development when you need to showcase interactivity and test the user experience. These prototypes are beneficial for gathering feedback on user interaction, navigation, and general usability.
How do I create a prototype in 6 steps?
Step 1. Define Objectives
The first thing I do is to make sure I have identified specific areas of improvement in my product.
Then I set objectives for what I want to achieve. I clarify my primary goals, such as validating a new design, testing usability, refining a feature or area of the product, or introducing new functionality. Basically, I want to identify my goal upfront so that I can stay focused on my objective.
Next, I define what I want to learn or achieve through the prototype, such as gathering feedback in order to identify areas for improvement.
Step 2. Assemble Requirements
After establishing the objectives, I convert them into tangible requirements for my UX team. I break down the objectives into specific functionalities and features necessary to fulfill the prototype’s purpose.
After preparing the requirements, I work with the UX team to develop some preliminary ideas. We begin by using paper prototyping to gather thoughts and ideas. Once we have something substantial in place, the UX team creates wireframes.
Step 3. User Testing
We then take the next step of inviting users or stakeholders to interact with the wireframe and provide their feedback. This step is essential in validating the user journey or simply making sure that we are moving in the right direction.
Step 4. Feedback Integration
We then integrate the feedback we receive during user testing to make further improvements. Together with the UX team, we examine the issues or concerns raised and make adjustments.
Step 5. Prototype Implementation
Next, I want to make sure that we have screens that users can interact with and get a feel for the functionality we’re aiming for. Sometimes mock-ups are enough at this point, but for more complex use cases, I turn to prototypes.
After getting feedback on the prototype, it will help us in the development process by putting each user story that we plan to implement, into context.
Step 6. Development Handover
So, at this point, I begin creating user stories and work together with the development team to refine them. After this, we can proceed to implement the functionality within the prototype into the product.
It’s important to ensure that everyone is on the same page and that the user stories accurately reflect the feedback gathered from the stakeholders.
When it comes to Agile development, prototypes may not always be necessary. If the requirements are well-documented and everyone involved has a clear understanding of the end goals, then prototypes might not be needed.
It’s worth noting that if a prototype involves development work, it’s crucial to assess its complexity and the value added before deciding whether or not to proceed. This ensures that we invest our time and resources wisely.
So, by considering all these factors, we can determine whether or not prototypes will be useful in achieving our project objectives.
Differences between MVP and Prototype
MVP (Minimum Viable Product) and Prototype are two distinct terms used in the product development process. It’s important to understand the differences between the two.
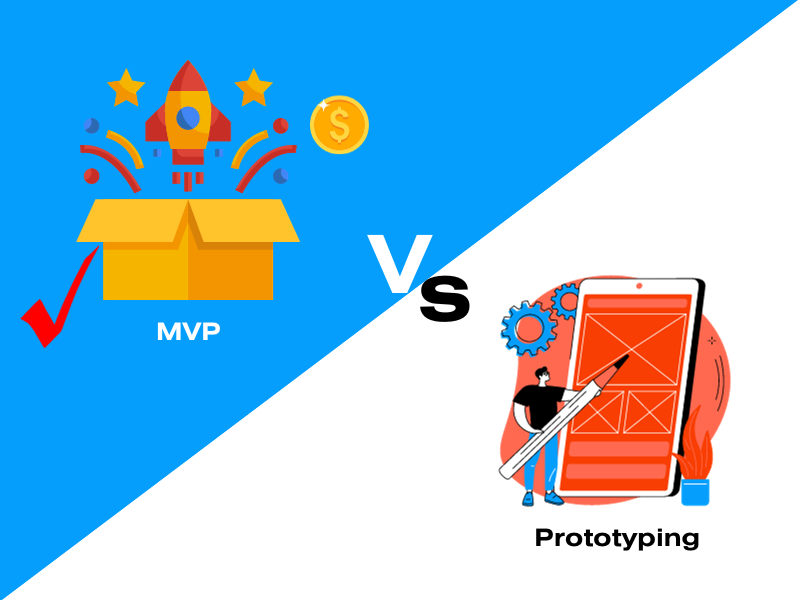
The purpose of an MVP is to launch a product with a minimum set of features that can be delivered to customers to validate the assumptions and learn from customer feedback. On the other hand, the purpose of a prototype is to test and validate design assumptions and gather feedback on a design concept before it is built.
An MVP is a functional product that can be used by customers, even if it has limited features. Whereas a prototype is a non-functional model or simulation of a product that demonstrates how it will look and behave.
In terms of the development stage, an MVP is usually developed in the later stages of product development, after significant research and testing has been done. A prototype, on the other hand, is developed in the earlier stages of product development, when design concepts are being explored and tested.
Moreover, creating an MVP requires a significant investment of time and resources to develop, as it is a functional product that can be used by customers. In contrast, a prototype requires fewer resources to develop, as it is a non-functional model or simulation.
Lastly, an MVP is launched to gather feedback from real customers, to learn and iterate on the product. Meanwhile, a prototype is used to gather feedback from users and stakeholders, to refine the design concept before it is built.
Final thoughts
What happens if you spend a lot of time creating a prototype and then realize that you should not implement it and release it?
Was it a waste of time?
Of course not.
The main purpose of building a prototype is to test out new ideas and gather valuable insights without having to commit to full development.
If the feedback you receive suggests that the proposed changes are not favorable, then that time spent on the prototype is not wasted, but rather a valuable learning experience.
By doing so, you have saved resources that would have been spent on implementing less effective features, and you have gained critical insights that can inform better decisions for the final product. This learning and validation from a prototype iteration will ultimately help improve the product’s usability and value over the long run.